With the release of The Hobbit: An Unexpected Journey, I have been delving into a number of hobbit crafts. My first project was Bilbo's sign for Bag End. I tea-dyed the paper with 6 teabags left for 20minutes to create a light shade of old-looking parchment. I then used a calligraphy pen of two sizes to spell out the lettering which I just copied from a still from the movie. (I found the full calligraphy set in an opp shop a few years ago for just $2. No regrets!)
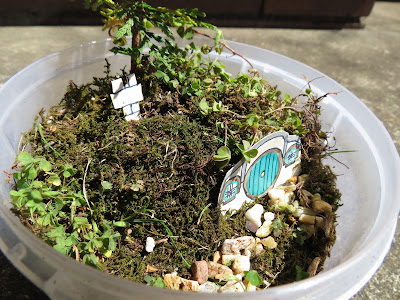
My second project was a real-growing miniture hobbit hole!! It's based of this fabulous original tutorial: Make a Miniture Hobbit Garden.
I began with a base of some glass beads that were just lying around in my room, then with a large layer of potting mix. I uprooted a little plant that was growing in one of our garden pots and replanted it into my hobbit garden. I also uprooted some moss growing around in the shady parts of our backyard. [note: since these photos, the moss has mostly withered. I am not an expert in gardening, but I believe moss requires more water than most plants.]
Final touches include a hobbit door/windows and a chimney. The door is just a piece of cardboard that I designed and coloured [note: the colour in inky pens will run (I learned this the hard way), so using pencil will ensure more long-lasting colour. Look at the original tutorial for a much better solution anyway with clay and paint!]
The door leans against the side of the little mound, but the chimney is attached to a toothpick and secured into the ground.
I hope you enjoyed my Hobbit tutorials!
-AlbusOwner


No comments:
Post a Comment